
Simple Overhang
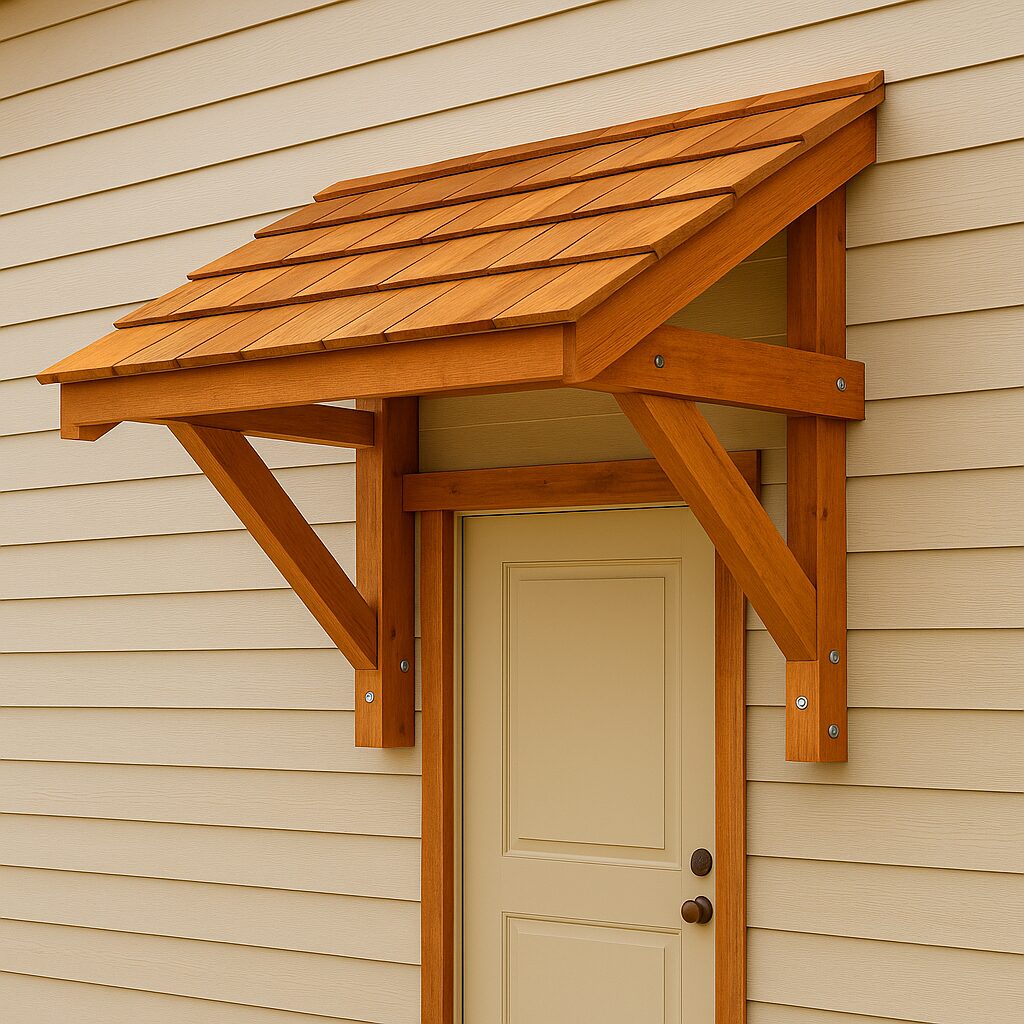
If you’ve ever been caught in the rain trying to unlock your back door — you already know why an overhang is a great idea. And yes, you can absolutely build one that looks good, keeps you dry, and doesn’t risk falling on someone’s head (and putting you into a lawsuit nightmare).
I already invested in architectural and structural engineering, so you don’t have to waste time, money, or brain cells figuring it out from scratch.
This guide shows you the two most common overhang setups used on homes across North America, adapted for our local climate in the Temecula Valley and the Inland Empire. Fasteners and hardware may vary, but as long as they are rated for the correct load, you’re safe.
We’ll go step-by-step through the build. If you need help with permits, inspections, red tape, etc., we have separate videos and walkthroughs for that on SuperHandyPro.com.
Step-by-Step Process
-
- Open the Wall Surface
Remove stucco or siding around the installation area to expose the wall studs.
Remove at least 12 inches more than you think you need — this gives room for proper waterproofing and flashing. - Install Solid Blocking
- Add 2×10 or 2×12 blocking between the studs wherever the overhang will attach.
- Use minimum 4 × 16d nails per side to lock each block in securely.
- Re-Waterproof the Wall
- Once your blocking is set and flush with the studs, install:
- Felt paper or house wrap
- Stucco wire (a.k.a. chicken wire)
- Pay attention to layering and water-shedding direction.
- We have specific waterproofing tutorials on WWW.SuperHandyPro.com covering flashing, pans, and bituminous sealants.
- Cut and Prep Your Lumber
- Follow your plans carefully when cutting rafters, joists, and support members.
- Install Structural Hardware
- Attach approved hangers, brackets, and anchors to the wall framing and sill plates according to your plans.
- Check Every Angle
- Be certain every beam and rafter is plumb, level, and aligned. Once it’s nailed, it’s part of your house.
- Build the Frame First
- Always assemble the structure before worrying about roofing.
- If you’re new to carpentry, watch our video tutorial — and please keep all fingers attached. (We mean this literally.)
- Add Reinforcement Screws
- Install structural screws exactly as specified in the plans.
- Roofing
- If you’ve never roofed before, this is the moment to call a professional.
- But if you’re a brave weekend warrior, we do have roofing videos on our website.
- Open the Wall Surface
And That’s It!
You’ve now built a strong, durable overhang that:
-
- Keeps you dry at the door
-
- Protects your home from rain damage
-
- Looks like it came with the house
-
- Is solid enough to survive your teenagers climbing on it (not encouraged — but realistic)
Serving the Inland Empire & Temecula Valley
If you want help designing, planning, or building your overhang anywhere in:
Temecula, Murrieta, Menifee, Wildomar, Lake Elsinore, Hemet, Perris, Winchester, Canyon Lake, and Surrounding Areas —
we can assist in person or guide you remotely.
Visit: www.SuperHandyPro.com
Where local homeowners learn to build like pros.